Instructions on how to change DNS on your Samsung, LG TV or Android device
Here’s how to change DNS on your existing device:
How do I change the DNS settings on my Samsung TV?
Make sure your Samsung TV is connected to a Wi-fi network or LAN cable.
- Go to Samsung TV settings (
Settings
). - Select basic settings (
General
). - Select Network (
Network
). - Select Network status (
Network status
) - Select IP Settings (
IP Settings
) - Select DNS Settings (
DNS Settings
) - Click “OK” on the console and select that you want to enter the DNS settings manually
(enter manually).
- To find out 8.8.8.8. and click “OK” on the console.
How do I reset the DNS settings on my Samsung TV?
- Go to Settings on your Samsung TV.
- Select the main settings (General).
- Select Network.
- Select Network status
- Select IP Settings (IP Settings)
- Select DNS Settings
- Click “OK” on the console and select that you want to set DNS settings automatically (
get automatically
).
How do I change DNS on my LG TV?
- Press the Home button (the button with the house on it) or the Settings button on the TV remote.
- Select “All settings”
- Select Network.
- Choose which connection DNS you want to change i.e. Wi-Fi or wired. Click on the one you are using.
- Then select “Advanced Wi-Fi settings”.
- Click “Edit” and enter DNS in the field 8.8.8.8
- Then click “Save”.
- To reset to the current DNS settings, you need to repeat the same steps, but tick the “Set automatically” checkbox.
How do I change DNS on my Android device?
- Go to Settings on your Android device.
- Select Network.
- Remember (write down) your IP (It will probably be in the following format: 192.168.31.xx)
- Remember (write down) your Gateway (It will probably be in the following format: 192.168.31.1)
- Select IP settings (IP settings)
- Select “Static”.
- Enter your current IP address that you have written down (you remember) (It will probably be in the following format: 192.168.31.xx)
- Enter (write down) your Gateway (It will probably be in the following format: 192.168.31.1) similar to the IP but 1 (unit) at the end
- Enter the new DNS address 8.8.8.8
- Click continue to confirm your changes
If you have any questions, you can always contact us at [email protected] or by phone +37069807004
Related Articles
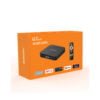
Set-top box G7 mini - S905W2-Android 11.0-RAM/ROM 2/16GB
€65,00Original price was: €65,00.€55,00Current price is: €55,00.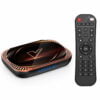
Set-top box Vontar X4 S905X4 4/32GB TV box Android 11.0
€89,00Original price was: €89,00.€84,00Current price is: €84,00.